Selling you a home, not just a house,
with distinctive service that moves you!


SOLD
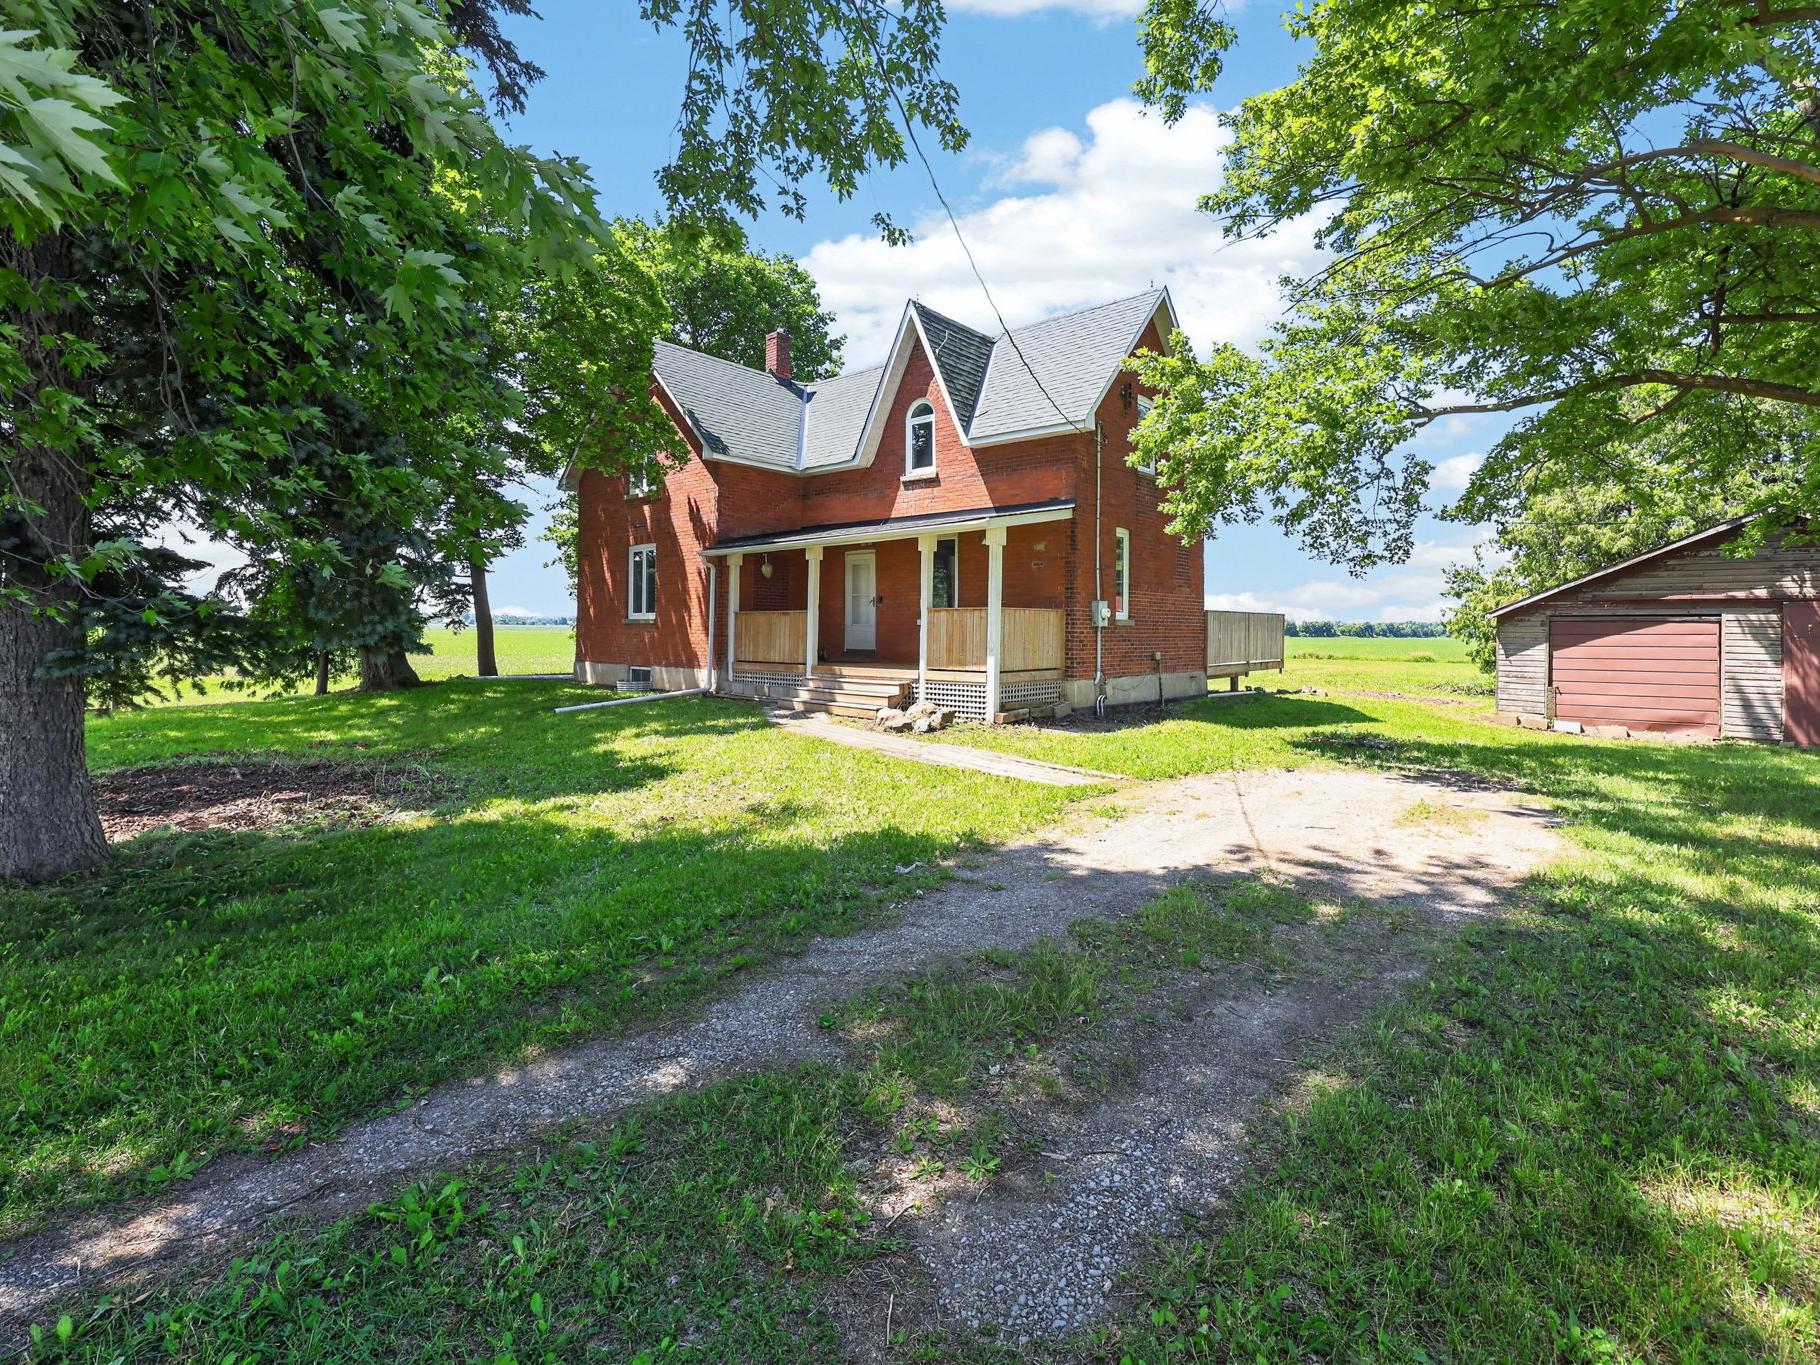
Country Property in New Lowell
MLS#S13539522
Escape to the peace and quiet of country living with this charming updated farmhouse nestled on a private 1.27 acre lot on a dead end road with detached garage. Surrounded by picturesque farm fields and mature trees, you'll enjoy breathtaking sunsets from the spacious back deck and the serenity that only rural living can offer - all while being only 10 minutes from grocery stores and restaurants. You will love the generous sized bedrooms upstairs and the primary bedroom is complete with its own ensuite and his & hers closets. This home has seen many valuable updates over the years including hardwood flooring in the kitchen (2026), upstairs (2019), and stairs (2026). Updated front porch (2019) and back deck (2017). New windows throughout, updated furnace (2014) and roof (2012), new exterior doors (2026) and updated light fixtures in Kitchen and uplstairs, plus mbr ensuite (2019).The basement had exterior water proofing in 2019 and is partially finished. The main floor kitchen & bathroom are waiting for you to design and make your own. The main floor bathroom already includes a toilet, sink and shower surround for you to install. If you have been searching for a property that offers privacy, modern updates with quality craftmanship and the chance to add your own finishing touches, this country retreat is one you wont want to miss.
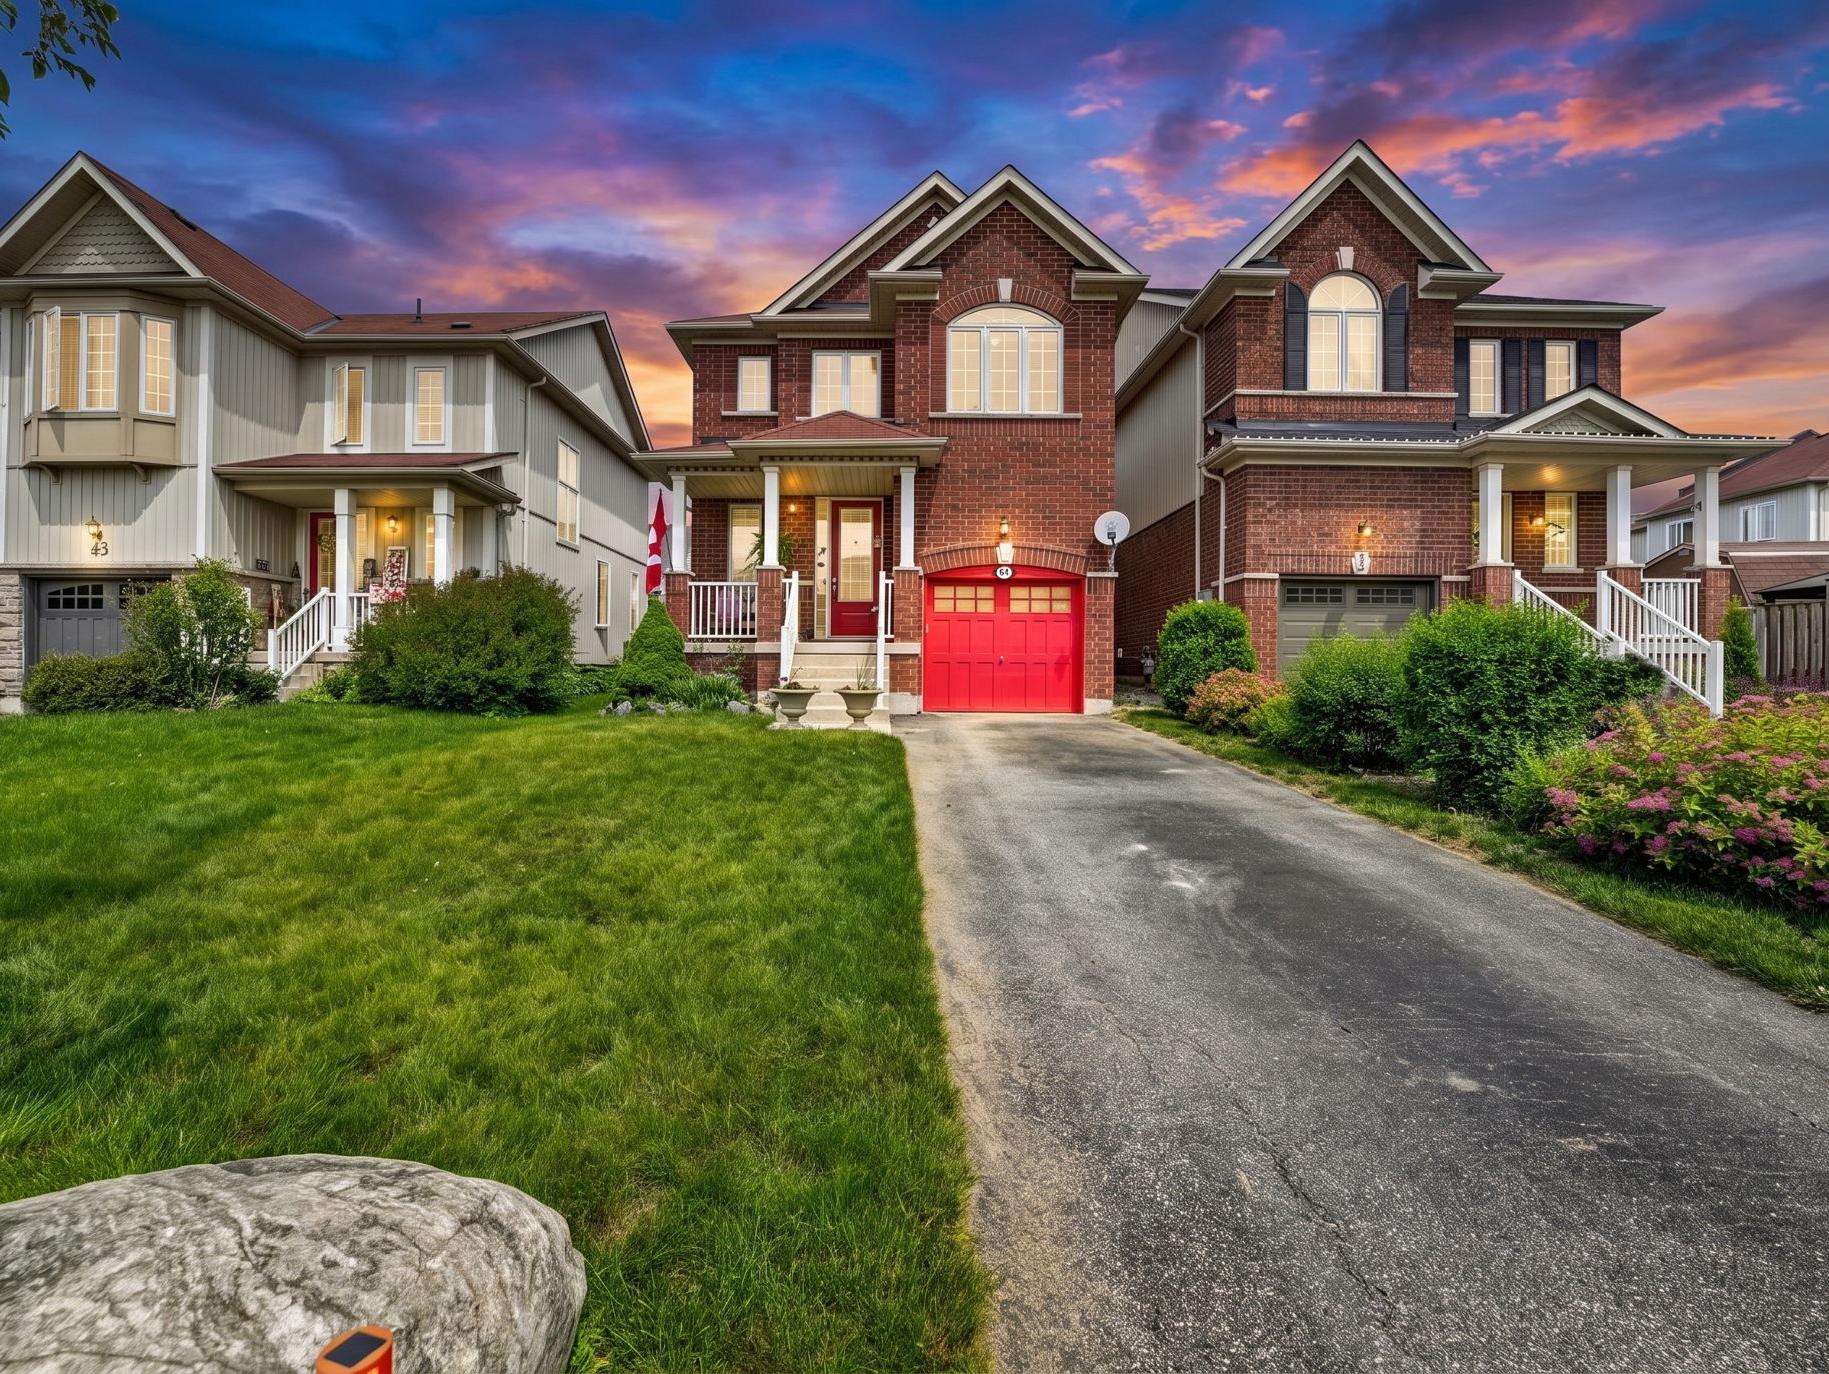
Beautiful Home for You and Yours
An Angus Gem
MLS#N13491052
This beautifully maintained home is finished top to bottom and is ready for it's next familty to move in and enjoy! Offering 3 spacious bedrooms and 2.5 bathrooms, this inviting property combines comfort, functionality, and is located on a street that has a true sense of community. The bright well appointed kitchen features a breakfast bar and eat-in area, creating the perfect space for everyday living. The fully finished basement adds even more living space with a nice sized recroom and a dedicated office - ideal for working from home, hobby space or a playroom. Step outside to a fully fenced backyard complete with perennial gardens, a charming gazebo, and a garden shed - perfect setting for relaxing or playing. What are the sellers going to miss most? The amazing neighbours they have, where everyone looks out for eachother. This home and location is hard to beat!
NEW PRICE!
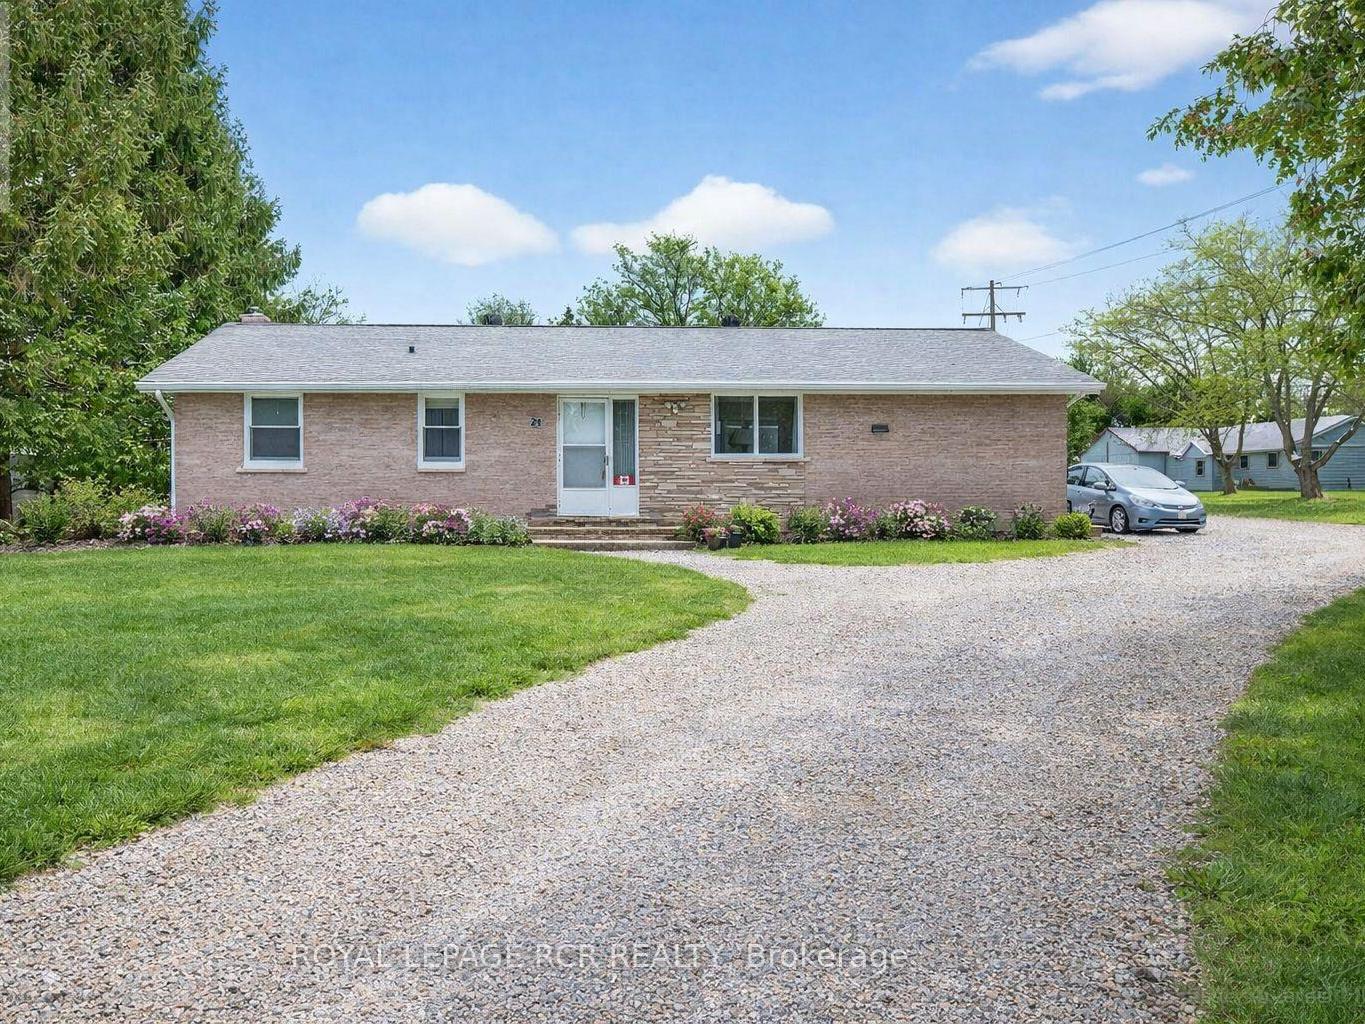
Hockley
MLS#N13003054
Rarely does an opportunity like this come up in the Hockley subdivision. Cherished by the same family since it was built, 24 Drummond St is ready for its next chapter! This solid brick bungalow has been meticulously cared for and provides the perfect foundation for its next owners. The main floor is bright & airy, anchored by large windows that flood the living spaces with natural light. You will find hardwood floors running through the majority of the main level. The unfinished basement with a seperate entrance gives you the opportunity to design it exactly as you want! Maybe a secondary suite, a massive recroom or games room .... you decide. Shingles replaced approx 2018. Walking distance to the park, Hockley general store, and a short drive to some great restaurants, golf and skiing. Dont miss this great opportunity to get into this fabulous area!
Looking for a new home? Want to sell an existing property? I can help!

Welcome to Sell with Marsha!
I'm passionate about real estate and pride myself on distinctive service that MOVES you!
I know that buying or selling a home is a big decision - you need an experienced professional to guide you through the process.
With 29 years in the Real Estate business, when you work with me, you can count on patient and professional support.
My personal knowledge of the local Real Estate market, combined with great negotiation skills and expert strategies, can help you find your dream home.
When the time comes to sell, I also have the expertise to help you get the best price in a time frame that suits your needs.
I'm excited about home ownership and love what I do!


Read My Blog
for helpful home and real estate tips!
Here's a teaser from this week's Blog:
Whether you’re just settling into your new rent-free digs, or you’ve been making mortgage payments for decades, every homeowner should be sure their toolbox has the necessary items to handle common problems around the house. That includes leaky faucets, drywall that needs patching, and heavy frames that need hanging. If you don’t already have a well-stocked toolkit, now’s the time to gear up...
http://agents.royallepage.ca/marsha/blog


